WordPress is a rather popular publishing software, and as such, it is an attractive target for attackers. A lot of websites use it, lots of websites do not have the most recent version and, even if the main WordPress installation is up-to-date, it suffers from the same problems as any other extensible environment: the plugins are not secured by any sandboxing mechanism, so a malicious or vulnerable plugin can allow access to the whole system. In 2019, there are automated tools that allow to automatically scan a WordPress website for vulnerabilities, and there is little one can do to prevent this.
In the first part of this series, we discussed basic settings for improving the security of WordPress. By using this basic configuration, you are safe against the majority of simple attacks.
In the second part of this series, we will be discussing advanced techniques to harden your WordPress installation. These techniques require more time to set up, some more complex configuration steps, but improve the security of your website and allow to defend against more motivated attackers.
Some more server configuration
The following advice is recommended, but the realization really depends on the hoster of your website. The more access to the Web server and the file system of your WordPress installation, the better. Often, shared hosters do not allow direct access to the instance where WordPress is physically running. Sometimes, you only have limited file access to the server, therefore no configuration of the web server (Apache, nginx) is possible.
HTTPS aka Transport Layer Security aka secure connections
TLS describes the encryption and authentication of traffic between your website and a visitor. When the browser has a small lock icon in its URL bar, the connection is encrypted and no one can look inside the connection to find out what you are looking at. Also, the website is protected from manipulation, as unencrypted connections can be modified by attackers to include malicious scripts and malware.
In April 2019, over 78% of connections use HTTPS, and it is really easy to get a valid TLS certificate for your website. Often, hosters allow to buy a certificate or include them in their hosting packages. If you host the server yourself, you can use a Let’s Encrypt certificate, which is free.
When you enabled HTTPS, you may need to configure WordPress to use it for the website and the admin interface. The documentation says:
FORCE_SSL_ADMIN is for when you want to secure logins and the admin area so that both passwords and cookies are never sent in the clear.
WordPress documentation
In your wp-config.php (which is found in the WordPress directory) add the following line:
define( 'FORCE_SSL_ADMIN', true );Secure file transfer with SFTP
When you download files from your server, or upload configuration files, you should also use encrypted connections. For the transfer, [tooltip tip=”Secure File Transfer Protocol”]SFTP[/tooltip] is often used, with software like FileZilla, SmartFTP or WinSCP. If you do not use an encrypted connection, anyone can intercept your password and connect to the server. Therefore, make sure to use SFTP!
Basic authentication
A good approach to security is starting to use server-based techniques to harden access to the WordPress instance. A popular method is Basic Authentication, also known as the .htaccess file. It allows to set a username and password protection for individual files and folders on a server. As described above, the hoster has to allow htaccess functionality for this to work. Also, you need to have file access (for example with FTP). If it does not work, you can try to ask your hoster to enable it for you.
Note: htaccess is a mechanism of the Apache webserver, while nginx has a different way to achieve the same. I am going to show both methods.
Apache .htaccess
A htaccess file is a configuration file for Apache servers. They contain instructions and rules for remote access. You can not only password-protect files and folders, but also redirect users, deny access to specific IPs and more. Read more about it in the official documentation.
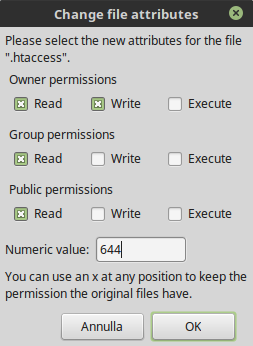
For now, create a “.htaccess” file (with the dot) inside your WordPress directory. While you are at it, make sure the file permissions are set up correctly. If you want to know how file permissions work, check out my blog post. In Filezilla, right-click on the file, select “File permissions” and enter 644.
If the file is already there, and the permissions are alright, you can simply append the snippet below to the end of the file. An example /www/html/wordpress/.htaccess file:
<Files wp-login.php>
   AuthType Basic
   AuthName "Restricted Area"
   AuthUserFile /www/html/wordpress/.htpasswd
   Require valid-user
</Files>

# Deny access to important files
<FilesMatch "(\.htaccess|\.htpasswd)">
   Order deny,allow
   Deny from all
</FilesMatch>
A short explanation: The first part describes basic authentication for the file wp-login.php, which is the entry point for the wp-admin area. You can choose a description which is shown to the user (“Restricted Area”), an AuthUserFile where the password is stored (more on that in a minute). Make sure to include the complete (absolute) path. Also, a valid-user is a user which entered the correct password.
In the second part, we deny access to the configuration and the password file for anyone. This only means that you can not access the file from remote, you can still change the file itself. Note: if you get an “internal error” with the above config, you could be using Apache version 2.4 and above. Then, replace the second part with:
# Deny access to important files
<FilesMatch "(\.htaccess|\.htpasswd)">
   Require all denied
</FilesMatch>
Now create a .htpasswd file (with a dot) in the same directory. Use this password generator to generate the file’s content. Select bcrypt with a cost of 11, enter a username and a password on the left side, then press Generate htpasswd content. Copy the generated username / hash combination into the .htpasswd file.
Now you should be asked for a password when you access the login portal.
Nginx ngx_http_auth_basic_module
For nginx, the basic authentication method is slightly different. You can still use the .htpasswd file and the instructions above:
Use this password generator to generate the file’s content. Select bcrypt with a cost of 11, enter a username and a password on the left side, then press Generate htpasswd content. Copy the generated username / hash combination into the .htpasswd file.
Next, you are going to need the configuration snippet below. Put it in the nginx site configuration:
location = /wp-login.php {
   auth_basic "Restricted Area";
   auth_basic_user_file /www/html/wordpress/.htpasswd;
}
If it does not work as expected, check the official guide here.
Conclusion
Given the appropriate access to the server, anyone can use the above methods to improve the security of their website. While very simple to implement, the protection methods are rather effective at preventing bruteforce attacks and using HTTPS is a must nowadays to protect against ad injection (popular with some [tooltip tip=”Internet Service Providers”]ISP[/tooltip]) and general credentials sniffing (e.g. from unsecured WiFi hotspots).
The downsides of these approaches are the loss of some usability. You have to login twice to access the WordPress dashboard (once to the server, once to the website), but as always, using a password manager helps with that.
In the next parts, we are going to look at plugins: which to use (or not use), what to consider, and what really helps.
Be First to Comment